How to create an Ubuntu bootable SD card
Bootable SD cards are quite useful in creating an operating system that is easily re-buildable within a relatively short period of time. It is something worth tinkering around with.
In case you’re not familiar with bootable SD cards, they are essentially any type of flash storage that contain a ‘boot’ partition, which is used by the system as a set of instructions to tell the computer to load an operating system that is stored alongside it.
Raspberry Pi has increased the adoption of lightweight operating systems such as RaspbianOS and Ubuntu. With that, they’ve created a simple tool that takes a snapshot of an operating system and write it onto a pen drive or an SD card.
There are many tools that can simplify the process of creating a bootable card and I will be using one that is called Raspberry Pi Imager, which was created by the Raspberry Pi team. Do keep in mind that the tool itself is universal and can be used for any other devices too.
What you need to get started with this tutorial:
- A working computer to perform the steps
- A pen-drive or an SD card that is at least 16GB
- A USB card reader depending on your computer port
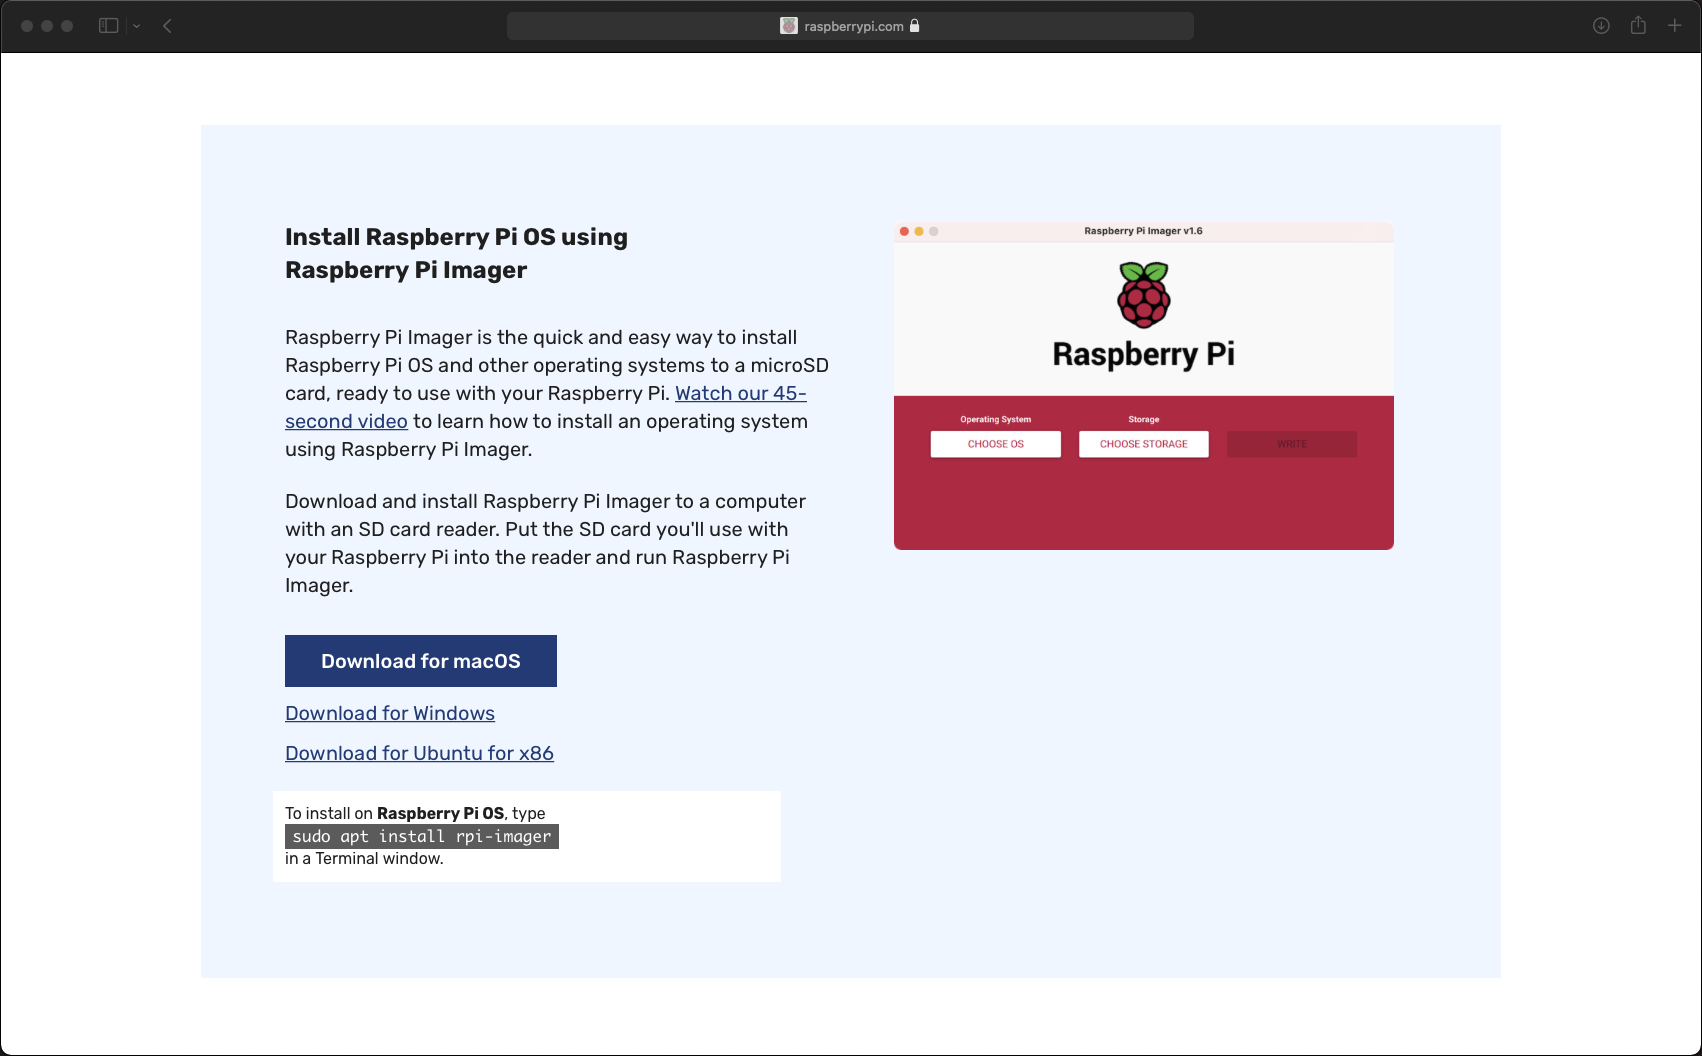
Go to the official Raspberry Pi website and download the ‘Raspberry Pi Imager’ for your computer’s operating system. I’m using the MacOS version for my Mac Machine. Once the download is complete, install and run the package.
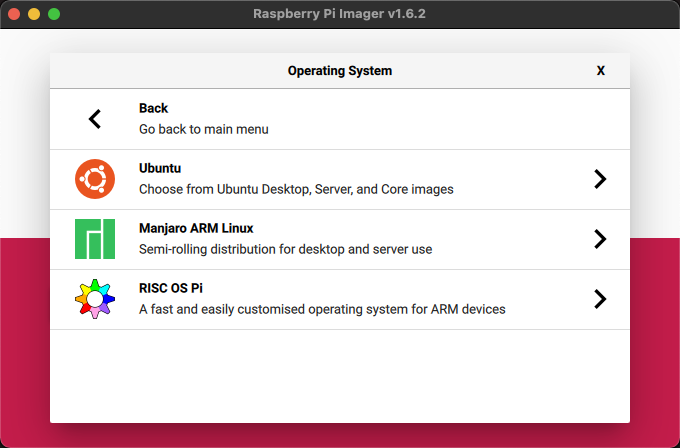
The application will prompt you to choose an image of the operating system you wish to install. Ubuntu falls under 'Other general purpose OS'.
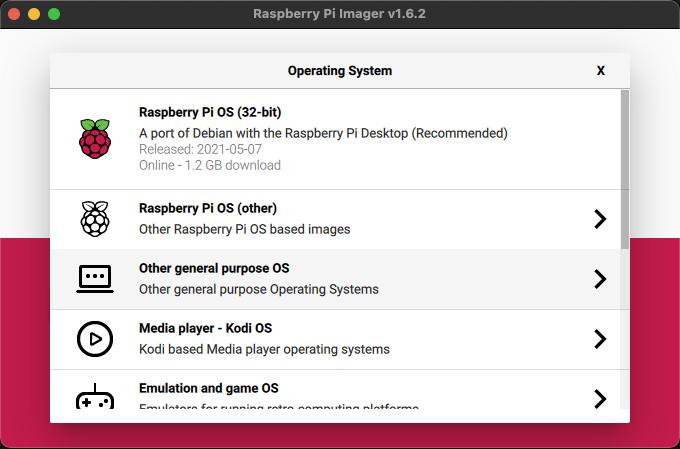
Select Ubuntu and you should see a list of available versions as shown in the screenshot below.
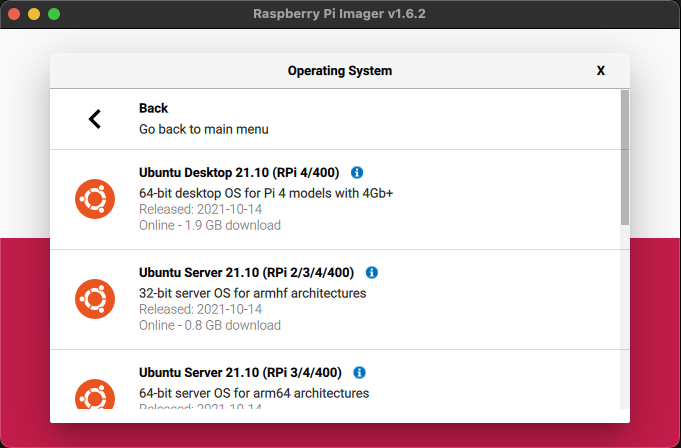
Choose the appropriate image for your needs while keeping in consideration the available hardware capacities you have left. For instance, a 32bit cpu chip will not be able to recognise a 64bit OS.
Keep in mind that most of these images are designed for an ARM architecture, making it ideal for Raspberry Pi and other ARM-based computers. If you need to use a different architecture such as AMD, you will need to download the image from a different source. The Raspberry Pi Imager tool will still be able to write that image onto the SD card. For this tutorial, I am using the Ubuntu Desktop 21.10 - 64bit.
Make sure to back up all of your data before you proceed to the next step.
Once you’ve decided on the image you want to use, you can proceed to select the SD card.
Plug in the USB card reader and it should appear in the list of available drives. Select your card and you’re ready to hit WRITE.
The process can take anywhere between 20 minutes to an hour depending on the image you’ve selected and the speed of the SD card you’re using. Once the process is complete, you’re ready to plug that card into a Raspberry Pi or any other machine of your choosing to boot it up.